Syncing to GitLab
You can sync your Modelbit git repo to a repo in your company's GitLab account. This is especially valuable for using your GitLab-based code review, CI/CD and Pull Request workflows on your Modelbit deployments.
This workflow requires you to have admin permissions within your GitLab account.
Create a new, empty Git repository for use with Modelbit. The GitHub integration will not complete if the repo already has files.
Adding your GitLab repo URL to Modelbit
First, make a new GitLab repo inside your GitLab account.
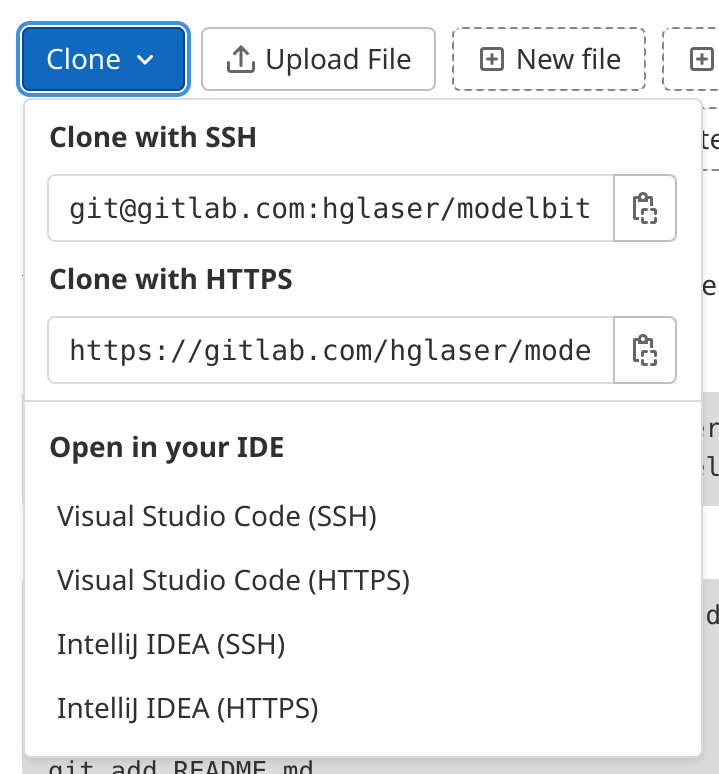
Once created, from the main page of your GitLab repo, click the blue Clone button and copy out the URL. The URL will look like git@github.com:your-organization/repo-name.

Head back to Modelbit:
- In
Settings, open theGit Settingspage. - Click the
GitLabbutton, then clickNext. - Paste in the URL of your GitHub repo and click
Next.
Before heading back to GitLab, copy the Deploy Key. This Deploy Key is Modelbit's public key for pushing and pulling your Git repo, just like a user's public key. It is not a secret.
Adding your Modelbit deploy key to GitLab
Open your repo in GitLab, then:
- On the left hand side, hover over
Settingsand clickRepository. - Click the "Expand" button next to
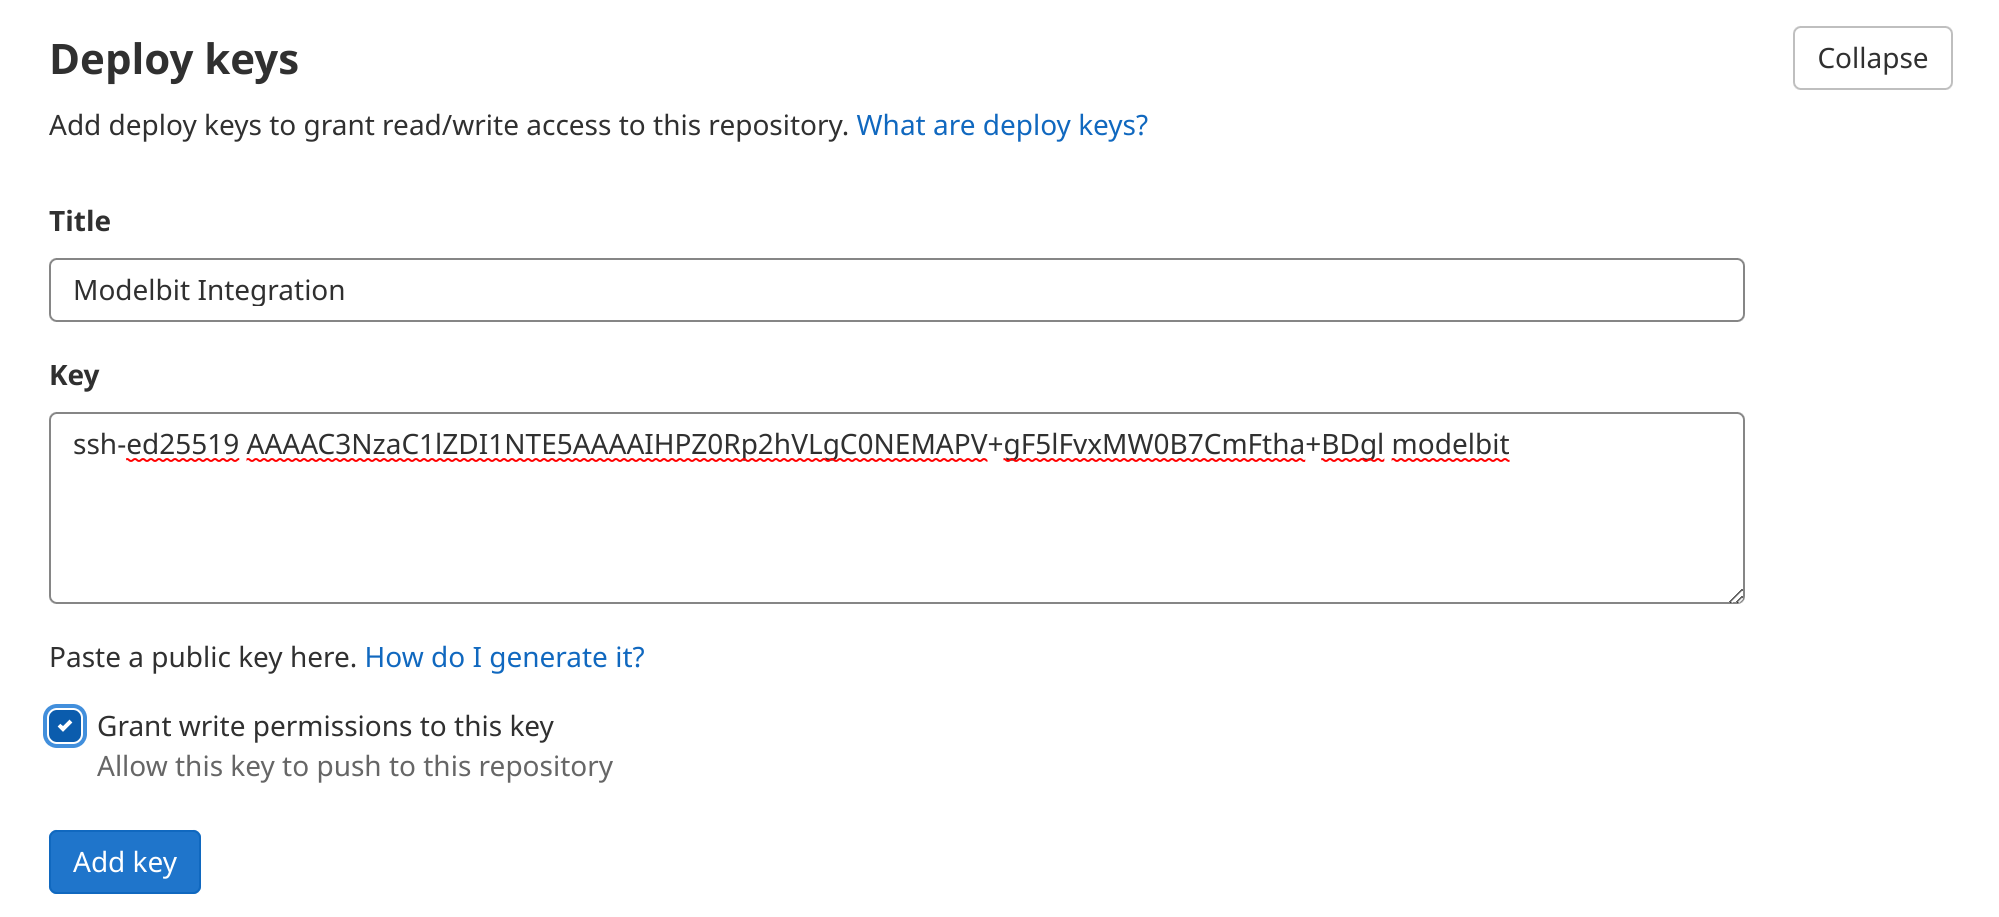
Deploy Keys. - Paste in the Modelbit deploy key in the
Keyfield. Give the key a memorable title, like "Modelbit Integration".
Make sure to check "Grant write permissions to this key". Click Add Key.
You must check the Grant write permissions to this key box in order for Modelbit to push changes to this repository.

Head back to Modelbit, click Next, and Modelbit will test the connection to GitLab. If the Deploy Key has been set with write access and no branch protection rules prevent Modelbit from syncing with the repo, you're all set.
Now Modelbit will sync to your GitLab repo, allowing you to use GitLab Merge Requests for merges, and all your GitLab-based tools for CI/CD, code review and more!
Do not use git clone with this repository, use modelbit clone. The modelbit clone command will clone your repo and configure it to work with Modelbit.
Protected branches
You may enable protected branches to facilitate advanced git workflows with your team. However, you must allow the Modelbit integration to bypass the branch protection rules.
To allow Modelbit to continue to sync with your GitHub repository:
- In GitLab, go to
Setting->Repository - Expand the
Protected branchessection - Ensure that Modelbit's deploy key is selected under
Allowed to push and merge - Ensure that
Allowed to force pushis enabled

GitLab Webhooks
To ensure the quickest sync between GitLab and Modelbit, configure GitLab to notify Modelbit of changes using GitHub webhooks.
You'll find Modelbit's Webhook URL and Secret in the Git Settings page.
In GitLab, go to your repository's settings area and:
- Click
Webhooks - Paste Modelbit's
Webhook URLinto theURLfield - Paste Modelbit's
Webhook Secretinto theSecret tokenfield - Check the
Push eventsbox underTriggers - Click
Add webhook
The next time you push changes to GitLab, Modelbit will be notified and immediately sync the changes.